There are two ways to view fee information:
- You can view a quick summary of the day’s spend in the Fee summary section for a client reference you have entered, or
- see more detailed information in the Fees report.
View a quick summary of the indicative daily fees
What to do
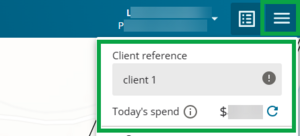
Select the Firm/Client reference at the top right of the screen (you can do this at any time).

Select the main menu icon. The indicative fees are displayed below the client reference. You can view other indicative fees by typing in a different client reference.

Or
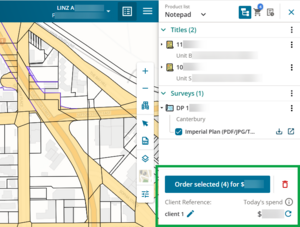
In the Product list. This is where you can update/change the client reference to view different daily spends across different client references. Select the Product list icon in the header and then scroll down to the bottom of the product list to see the Client reference and Today's spend.

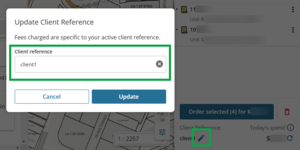
Select the pencil icon to edit the client reference.

The fees displayed in the fee summary are indicative only and are specific to the current client reference.
Fees are charged when the documents are delivered, not when you make the purchase.
Any duplicate search charges with the same client reference and the same document type/description, that are ordered on the same day, will be cancelled overnight. If you check again the next day, the status of any duplicates is ‘Cancelled-Withdrawn’ and the charges are reversed.
Run a fees report
What to do
You can run a fees report for a period of time, a specific user, or all users, and with a specific client reference.
Select Fees report from the main menu.

The Fees report page will open.

If you work for multiple firms, check you have the correct firm selected. To change the firm, select your user ID in the header, then select the firm you want to run the fees report for.

If you switch firms the name of the firm will also update in the header text.

If you don't have any associated firms, it will just say Fees Report (and have no firm).
Enter the date range and click on the Apply button.

The maximum length you can select for a date range is 1 year.
Select User(s). You can select all users or a single user.

The Client reference field is a free text field. Click into the field and type in the client reference you want to appear on the fees report.

Leave this field blank to return results for all client references.
If there are any items that did not incur a charge, and you want them included in the fees report, check the Include zero-charge items box.

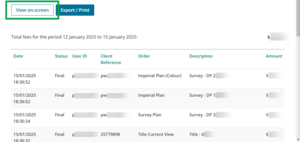
You can view the fees report on-screen or you can export / print the fees report.

If you choose to view the fees report on-screen, the results will populate in a table below.

If you change any of the details you previously entered when choosing to view the fees report on screen, you will need to click the View on screen button again to update the results in the table.
If you select the Export / print button you will see a pop-up box with options that allow you to download the fees report as a .PDF or as a .CSV file.

When you select the Download button you will momentarily see a pop-up message telling you the fees report is being generated, it may take some time, but you can keep working.

You can leave the fees report page and continue working in Landonline, but don’t close out of Landonline or you may need to set up and run your fees report again.
You will momentarily see a message if the report has successfully generated.

The browser you use will determine how the Fees report is downloaded. You will either see a confirmation notification of the download at the top of your screen, or at the bottom of your screen. Typically, the Fees report will be downloaded to your default download location.

If the fees report doesn’t show any data or you think you are missing data, try using fewer filters, apply a wider date range, and check the spelling of your client reference.