You can download a one-time use support applet to allow us to view and control your computer if you haven't installed the Remote Access tool before you call customer support.
You may also download the applet each time you phone us if your firm's IT security settings don't allow you to install the Remote Access tool.
The download takes only a few minutes and will allow our customer support to have remote access to your computer while you are on the phone.
Your system settings may prevent you from downloading this applet. If this happens contact your IT administrator for help.
Please remember:
- only use the Remote Access tool if you've been instructed to do so by a LINZ customer support agent
- do not leave your computer unattended during the phone call
- you can end the remote access or phone call at any time.
1: Agree to remote access with the customer support agent.
First, agree to remote access with the customer support agent.
2: Close any confidential documents.
Close any confidential documents or anything you don't want our customer support agent to view.
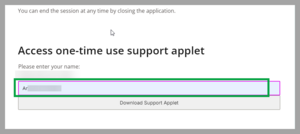
3: Enter your name and download the support applet.
Go to the Download Support Applet at the bottom of this page.
Enter your name and select Download Support Applet.
4: Open the downloaded file.
The applet will download to your Downloads folder. It may take up to 1 minute to appear.
Find the file Support-LogMeInRescue.exe and click on it to open it. Make sure you choose the most recent download.
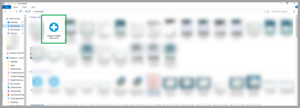
You can also go to the search bar on your browser and hold down CTRL and then press J to bring up a list of recent downloads in your browser tab. Then select Open file to open the applet.
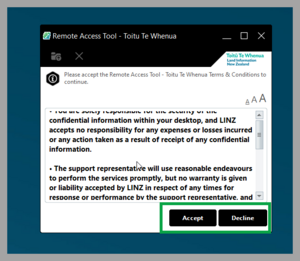
A Terms and Conditions window will appear.
5: Accept the terms and conditions.
Use the vertical scroll bar to view all the terms and conditions in the window.
Select Accept.
6: Wait for the agent to accept your connection.
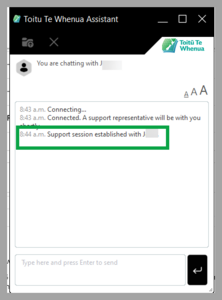
A message will appear saying that you are connecting and then connected. Wait for the customer support agent to accept your connection.
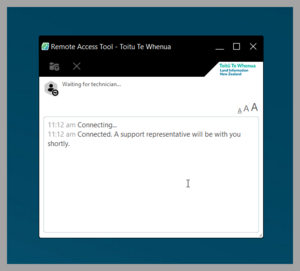
Once connected a message will say: Support session established with [agent name].
7: Accept request to view and control your computer.
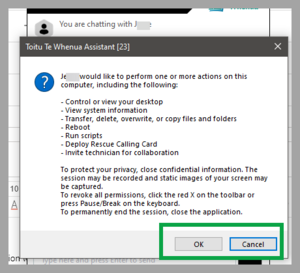
The customer support agent will send you a request to view and control your computer.
Review the actions and select OK if you accept. Select Cancel if you want to decline remote access.
You can end the session at any time by closing the application.