In New Landonline you can do a discharge or withdrawal of some instruments to enable a full discharge.
For partial discharges or withdrawals in Titles mode, the prepare pages are essentially the same as a full discharge. The partial discharge will not affect all of the titles.
Mandatory fields are marked by a red asterisk * and must be completed for successful pre-validation, certify and sign, and submission.
1: Navigate to the Prepare instrument page.
To access the Prepare instrument page you can:
- Select the instrument hyperlink to navigate to the Prepare instrument page when an instrument is collapsed.
- Select the Prepare button when an instrument is expanded.
- Use the menu that looks like a 3-dot icon at the end of an instruments row and select Prepare instrument.
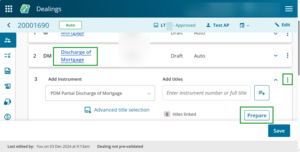
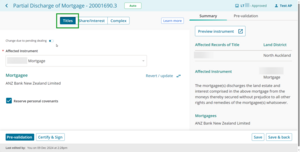
2: Check Titles mode is selected.
Titles mode is selected by default for a partial discharge or withdrawal. The mode type can be changed if the instrument is not discharging/withdrawing as to some of the affected titles. For help on preparing in Share/Interest or Complex mode:
Prepare a partial discharge in Share/Interest mode
Prepare a partial discharge in Complex mode
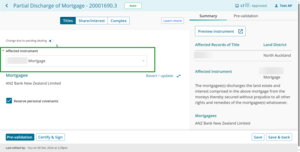
3: Check the instrument number is correct, or the field is blank.
Check the instrument number is correct or if the Affected instrument field is blank.
Use the drop-down menu to select the relevant instrument from the list.
If the field is blank and there are no options in the drop-down menu, there are no instruments to discharge on the title for this instrument type.
4: Choose the interest holder's names.
The registered Encumbrancee/Mortgagee/Charge holder/Caveator/Claimant name will automatically display but is read-only. However, you can use the:
- Change due to pending dealing toggle above the Affected Instrument to edit, add or delete the names displayed. For example, use when an instrument in a prior dealing or a prior instrument in the same dealing is changing an interest holder's name.
- Revert / Update button to re-set the interest holder’s name to reflect the Register or to update names to reflect any prior instrument in the dealing. For example, if the interest holder details have been edited using Pending dealing, using Revert/Update will revert to what is recorded on the Register. Or if a prior instrument has been added to your dealing which changes the interest holder, using Revert / Update will pull through the updated names.
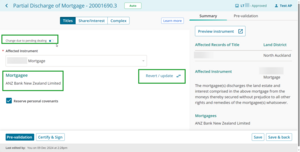
Some instruments, such as a Statutory Land Charge, will not automatically display the charge holder name. You will need to manually enter these details. You can also add and remove details if they have been manually entered.

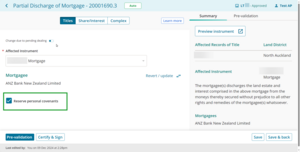
5: Uncheck Reserve personal covenants, if needed.
If applicable, when discharging a mortgage or encumbrance, uncheck the Reserve personal covenants checkbox if the parties haven’t made these arrangements relating to the rights and remedies of the Mortgagee/Encumbrancee.
If applicable, when discharging a Charging Order or Statutory Land Charge, check the This instrument is exempt from fees checkbox if the instrument is exempt from fees pursuant to the relevant statute.
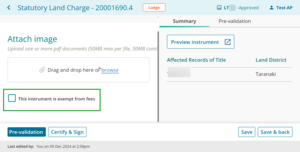
A fee may be charged later for this instrument if we find this checkbox has been used inappropriately.
6: Preview the instrument.
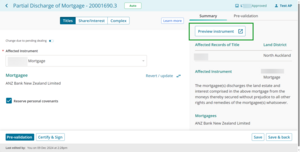
The Summary tab will automatically update and display a read-only summary of some key details entered on the left-hand side of the page.
Use the Preview instrument button to view, print or download the full instrument preview, including any ‘Add Text’ fields, certifications and signatures.
7: Save the instrument details.
Save the instrument details located at the bottom right-hand side of the page.
Use Save to save the information and remain on the Prepare instrument page.
Use Save & back to save the information and return to the Instruments & Roles page.