Use Complex mode to prepare a mortgage:
- of only part of the land
- when dealing with only some of the shares and/or interests of the owners
- when adding specific conditions or clauses to the instrument
- for third party transferors
- to add preset wording.
Mandatory fields are marked by a * red asterisk and must be completed for successful pre-validation, certify and sign, and submission.
Affected titles must have the same ownership and shares. See:
Dealing with titles with different ownership
1: Navigate to the Prepare instrument page.
To access the Prepare instrument page you can:
- Select the Mortgage hyperlink when the instrument details are collapsed.
- Select Prepare when the mortgage instrument details are displayed.
- Use the menu that looks like a 3-dot icon at the end of an instruments row then select Prepare instrument.
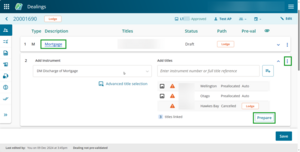
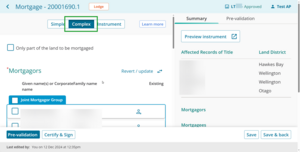
2: Select Complex to change this mode.
By default, Simple mode is selected for a mortgage instrument.
Choose Complex mode to deal with:
- different shares or interests
- when dealing with only part of the land
- to add additional details such as texts or images.
The mode type can be changed back to Simple if the mortgage is for all registered owners over all of the affected titles.
Prepare a mortgage in Simple mode
The mode type can be changed to Instrument to mortgage a mortgage, encumbrance or other interest, including lease or easement instrument.
Prepare a mortgage in Instrument mode
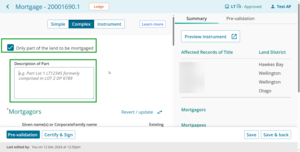
3: If dealing with part of the land, select the Only part of the land to be mortgaged checkbox.
Select the Only part of the land to be mortgaged checkbox if the mortgage is only for part of the land.
Enter the legal description in the Description of Part field for the part to be mortgaged. The Description of Part field is a free text field with a limit of 500 characters.
Ensure you include all the details required. For example: Part Lot 1 LT12345 formerly comprised in Lot 2 DP6789.
This instrument will step down to lodge if the Description of Part field is used.
4: Check the Mortgagors are correct.
The registered owners will automatically display in the Mortgagor section.
The names of the owners may also reflect any change of ownership instrument that has been prepared in the same dealing, prior to the mortgage.

You can do the following actions with the mortgagors:
- change due to pending dealing
- revert or update interest holder's names
- view additional information for the mortgagors.
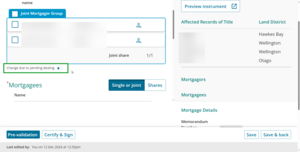
Change due to pending dealing
Use the Change due to pending dealing toggle under the mortgagors to edit, add or delete the names displayed, including any additional information such as aliases. For example, use the toggle when an instrument in a prior dealing is updating who the mortgagors will be, or when dealing with protected (hidden) titles or instruments.
You will need to confirm you want to modify the names before making any changes.
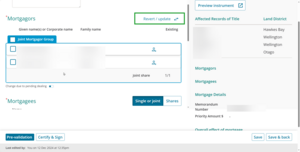
Revert/update
Select the Revert/update button above the Mortgagor section to re-set the mortgagor names to reflect the Register and any prior instruments in the dealing.
For example, if the name has been edited using Change due to pending dealing it will revert to what is recorded on the Register. Or, if a prior instrument has been added to your dealing which changes the mortgagor, using Revert/update will pull through the updated names.
Additional mortgagor details
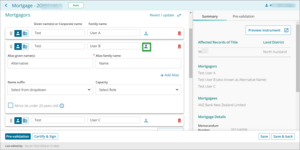
To view other details such as an alias, suffix or birth date of a minor, select the person icon to the right of the mortgagor.
If the person icon is filled in blue there are additional details recorded for that mortgagor.
To add, edit or remove details, turn on the Change due to pending dealing toggle, then select the person icon to make changes.
5: Select some or all the owners who will be affected by the mortgage.
Select the checkboxes next to the affected mortgagors. To affect all mortgagors, select the checkbox next to Joint Mortgagor group.
Review the Mortgagors section in the Summary tab to check your selections are correct.

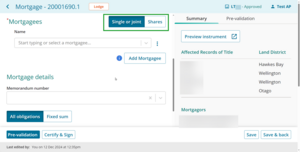
6: Select whether the Mortgagees are Single or Joint or Shares.
By default Single or joint is selected.
Select Single or joint for one or more mortgagees who will hold the mortgage solely or together.
Select the Shares where mortgagees will hold the mortgage in shares or amounts.
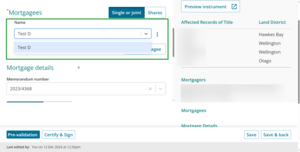
7: Select or enter a Mortgagee.
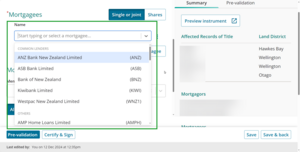
Use the drop-down menu in the Name field to view a list of common mortgagees that have associated quick codes.
The most common lenders are listed first.
Either scroll down the list or start typing the lender’s name to filter the available options.
Add a new mortgagee
For other mortgagees, such as private mortgagees, type the name directly into the Mortgagees field.
After entering the name of the mortgagee, select it from the drop-down menu to confirm your entry.
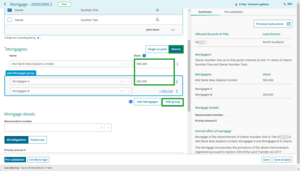
Add additional mortgagees, shares or create a mortgagee group
Select Add Mortgagee to add a new mortgagee row.

In Shares mode an extra column appears where you can enter the shares each mortgagee will hold.
You can enter the shares as a number, fraction or dollar value.
You can also select Add group to create a joint mortgagee group, where 2 or more mortgagees hold a share together.
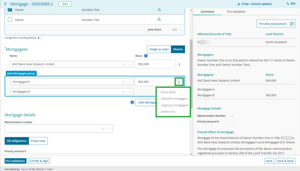
Additional actions – three-dot menu
Select the 3-dot menu to:
- move mortgagees up or down
- add a new joint mortgagee
- ungroup mortgagees
- delete rows.
8: Add a bank client reference
If the mortgagee is subscribed to Landonline a Bank Client Reference field will appear.
If the field appears you must enter a reference.
Type in the reference into the Bank Client Reference field.

This field is free text. You can enter words, numbers and symbols.
Editing the bank client reference
Once the instrument is signed you can edit the bank client reference at the submit stage.
Find the bank client reference in the field next to the mortgagee in the Notice to Mortgagee section of the Submit screen.

Enter changes.
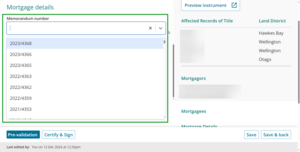
9: Select or enter the Memorandum number.
Use the Memorandum number field to look up a memorandum.
If the mortgagee has specific memoranda these will be listed first, followed by common or generic memoranda such as ADLS.
Either scroll down the list, which is arranged from newest to oldest, or start typing part of the memorandum number to filter available options.
10: Select either All obligations or Fixed Sum and enter required information.
All obligations
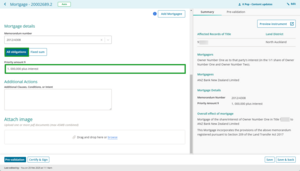
By default All obligations is selected.
Enter the Priority amount for the mortgage. You don't need to add a $ sign and the field accepts both numbers, characters and text.
This is not a mandatory requirement, however it's commonly used. A pre-validation warning will display if the field is left blank.
Fixed sum
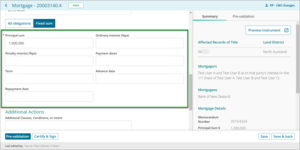
At a minimum you must enter the principal sum amount in the Principal sum field. You don't need to add a $ sign.
Complete the other mortgage details if known.
Fields are free text so you can add any complex interest payment prvisions. A limit of 250 characters is set per field.
Use the Additional Clauses, Conditions or Intent field to add any further text. But note this will cause the instrument to step down to Lodge.
The Summary will automatically update with the wording or you can use Preview instrument to view the full instrument details.
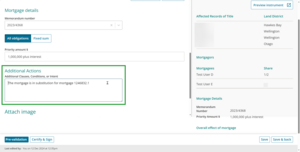
11: Add text to the Additional Clauses, Conditions or Intent field if needed.
Use the Additional Clauses, Conditions or Intent field to include additional details, such as supplementary clauses and conditions or to clarify the intent for the mortgage. This is a free text field.
Ensure you include all the details required.
This instrument will step down to Lodge if this field is used.
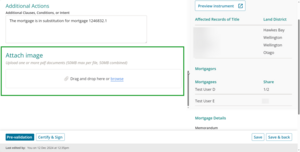
12: Upload an attachment to support the mortgage, if needed.
Use the Attach image field to add PDFs. You can:
- drag and drop a PDF into the field, or
- select browse and upload a PDF from your files.
There is no limit on the number of PDFs you can attach, but the size of all attachments together must not exceed 45MB. You won’t be able to save the Prepare instrument page if any or all attachments exceed 45 MB.
Delete one or more attachments until the combined size is 45 MB or less.
You can view attached PDFs by:
- clicking on each PDF, or
- selecting Preview Instrument to view all instruments and attachments.
Attaching an image will cause the instrument to step down to Lodge.
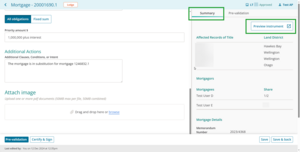
13: Review the Summary and preview the instrument.
The Summary tab will automatically update and display a read-only summary of some key details entered on the left-hand side of the page.
Select Preview instrument to view, print or download the full instrument preview, including any added text, attachments or certifications and signatures.
The instrument preview might take time to load if you have attached PDFs. This is because it needs to compile structured data with the attachments.
14: Save.
Select Save at the bottom right of the page to save the information and stay on the Prepare instrument page.
Select Save & back to save the information and return to the Instrument & Roles page.