By default all Landonline users are set up to receive both an online and an email message for those notice types where an online message is an option. These online messages can be used as an alternative to relying on an emailed notice.
To view your online messages select the ‘My Messages’ folder which will take you to the ‘Messages Received’ tab. This displays a list of messages sent to you about transactions. There are a number of different messages that appear depending on the type of user – Titles, Survey, TA. Some of these messages are information only messages whereas others have attachments. These attachments can be the notice associated to the transaction.
The Messages Received tab has two areas:
- The top area of the Messages Received tab lists all messages.
- The Details area displays the contents of the message, and the associated attachments which can be viewed and saved.
You are able to filter messages by type using the drop down list available at the top of the tab page.
When a message has an attachment a paperclip icon displays with the Message in the Messages Received list.

In the screen shot above there are 2 messages relating to Dealing 9248263. The first row displays a paper clip icon indicating there is an attachment. The 2nd row is a message advising the dealing has been registered.
When you select a message from the list with the paper clip icon, the attachment in the Details section becomes active.


If you then click the View button the notice for that transaction will then display.
Although the example screen shots relate to dealings, surveyors and TA users have the same functionality.
Receiving online messages for notices is a preference option that is set to ‘on’ when you first use Landonline, however some people have chosen to turn this setting off
Each person attached to a Landonline account is able to check and set their individual notice preferences. This ensures you receive an online message (where available) for each respective notice type in addition to the emailed notice.
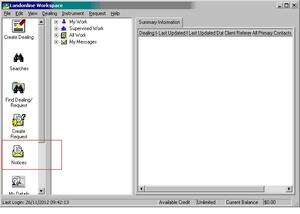
You can also view all notices for your firm’s Landonline account using the Notices Icon in the Workspace Tool bar.
To set your preferences for Notices, open the Notices icon in Workspace

and select Notice/Preference from the menu to open the Preferences screen and make the appropriate changes.
You can also view your notices and all other notices for your account using the Notices Icon in the Workspace Tool bar.
For more information about how to change your preference settings or to search Notices using the Notices icon check out the user guide.